
|Articles|September 3, 2015
It’s all fun and games with pediatric patients
Author(s)Jessica Barr, COMT, ROUB
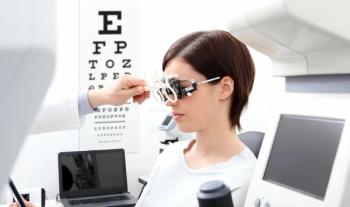
The pediatric eye exam differs greatly from the adult eye exam-children are more than just tiny adults. To further that point, the whole dynamic of the exam is different because you are really interviewing and interacting with the family and not just the patient. In the pediatric arena, the family becomes your patient.
Advertisement
The pediatric eye exam differs greatly from the adult eye exam-children are more than just tiny adults. To further that point, the whole dynamic of the exam is different because you are really interviewing and interacting with the family and not just the patient. In the pediatric arena, the family becomes your patient.
The first step to eliciting a good exam is to build rapport with the patient and the family. Small children are often timid, hiding behind Mom or Dad’s leg, and shying from the big scary exam chair.
Let them shy away; you don’t need them in the chair to get your history and have a chat with Mom or Dad. Setting a relaxed tone for your interaction is reassuring to them. Aside from having to read an eye chart at a fixed distance, most other aspects of the exam can be done in a different seat, or even sitting on the floor. In a small child, history starts with the parents (this helps make the child comfortable and builds trust).
In an older child, history starts with the patient and is verified or added to by the parent. Children’s participation in their medical care should increase commensurate with their age. Autonomy is one of the pillars of medical ethics, and that extends to minor-aged patient.
Next, we move on to the physical exam. Have you ever written “unable” for the exam of the child who has come to your office?
Unless you work for a pediatric ophthalmologist, it may be standard operating procedure to write “unable” (or something similar) for the young child who has come in to your adult or general ophthalmology practice. Here is the most important tip in this article: Something is better than nothing.
In our youngest and least cooperative patients, we start with the most basic techniques and eventually graduate to the more sophisticated techniques used for examining adults.
Let’s review these techniques.
Visual acuity
Perhaps a 1-year-old cannot read the eye chart, but can he fix and follow? At the very least, is the child light averse or light perceptive? As children get older, the method of visual assessment becomes increasingly more sophisticated. The visual assessment technique evolves from light averse, to fix and follow, the preferential looking test, matching pictures, then finally graduating to the standard Snellen acuity chart that we use on adults.
First, assess if the patient is reactive to light. Next, see if she can fixate on the light and follow the stimulus. This is the fix and follow (F+F) technique. After that, the technique gets slightly more sophisticated. Is her gaze central, steady, and maintained (CSM) on the stimulus? Remember, these two techniques require only a target to fixate-no other special equipment.
Related:
In the pediatric ophthalmology practice, techs also utilize a type of visual assessment called the preferential looking test. For this test, the patient is shown large, rectangular cards. Stripes or pictures are docked to either the left or the right side of the card.
The Teller Acuity Cards use stripes, and Cardiff Cards use pictures. As you progress through the cards, the stripes or pictures grow fainter and fainter, requiring higher and higher levels of visual acuity to see. The cards are held face down so the examiner is blind to what is on the other side.
The examiner holds up the card to the patient and judges the side of the card where the patient preferred to look. Hence, this is named the “preferential looking test.” The fainter the stripes or pictures the patient responds to, the higher the level of visual acuity. If cooperation permits, you can also ask the child to point to the stripes or pictures. This level of interaction offers a greater level of accuracy.
Once the children begin interacting with you, you can start trying to check vision on the eye chart. Pre-verbal children can hold a card with the symbols on it and point to each symbol to match to the optotypes on the acuity chart. We begin by using pictures, instead of letters, for pre-literate children.
A similar, yet slightly more sophisticated method, is HOTV matching. The child holds a card with the letters H-O-T-V. The eye chart is matched to use only these letters.
Finally, we graduate them to the Snellen chart. The examiner must be forgiving and acknowledge that children may know most letters, but not all. If children are afraid to say the wrong letter, encourage them to trace the letter in the air. At times, children may lack the confidence to get started reading the letters, and you need to help them.
Young children need help getting started with many tasks, so give them the first letter on a Snellen line. This can help give them momentum to get started. Use lots of encouraging words. Offer lots of smiles and high fives. Give them praise when they are doing well to encourage them to keep participating.
Pupils
With adults, we instruct them to fixate in the distance while we employ the swinging flashlight test to assess direct and consensual reaction to light. We are documenting PERRL or PERRLA (pupils equal round reactive to light and accommodation). Maybe you cannot complete a full swinging flashlight test to assess pupils, but are the pupils equal and round? Reactive? No obvious pupil defect? This is an area of the exam in which it is critical to document something.
Related:
Motility
The standard technique for adults and most sophisticated methods to evaluate ocular alignment are the covers tests and Maddox rod. We use videos, flashing lights, or any type of visually stimulating target, to promote fixation in children sitting for the cover tests. If they cannot fixate and cooperate for cover tests, learn the Hirshberg technique, which requires only that you shine a light at them. If cooperation permits, incorporate prisms and use the Krimsky technique.
To utilize the Hirshberg technique, the only tool you need is a strong and direct light source like the transilluminator we use to check pupils. The light is shined at both eyes while seated in front of the patient. You want to be reasonably close to see the reflection of light on the cornea (corneal light reflex, or CLR), but as far away as possible to minimize accommodation and convergence. The technician assesses how central the CLR is in each eye and the symmetry of the light reflex on the eyes.
A reflection that is slightly decentered nasally in both eyes, but symmetric, is a normal and common finding. If the CLR is decentered nasally in only one eye, this can indicate the presence of exotropia. For each 1 mm of decentration, we estimate approximately 15.00 D of prism deviation. Conversely, if the light reflex is decentered in one eye in the temporal direction, this indicates the presence of esotropia, and the same 1 m to 15 D of prism deviation applies. When the light reflex is decentered superiorly or inferiorly, this indicates the presence of a vertical, or hyper, deviation.
Moving forward, we integrate of the use of prisms to recenter the CLR and take our measurement of the deviation from the amount of prisms required to center the reflex. This is the Krimsky technique. Both of these techniques are significantly less sophisticated than the cover tests with prisms and provide only an estimation of the deviation. If you cannot recall all of the details of utilizing and documenting the Hirshberg or Krimsky techniques, at the very least, document the presence of CLR asymmetry for the physician.
Confrontation visual fields
Children are not unlike many of our adult patients: they have difficulty fixating on a nonmoving target for long periods of time. Turn a confrontation visual field test in to a staring contest to encourage fixation. Consider using toys instead of having them count fingers. Be patient. Give the pediatric patient multiple opportunities to accurately participate in the confrontation visual field.
Related:
Tonometry
If you are unable to applanate or use a Tonopen, palpate the eye and document a soft globe. A common description for this technique is “soft to palpation” or “STP.” This technique requires only that you gently press on closed eyelids and comment on the firmness of the globe underneath.
Once an eye becomes firm from elevated intraocular pressure, the pressure is usually very high, so this is not a very sensitive test. If you know you have always had normal intraocular pressure (IOP), consider touching your own eyes for a point of comparison to the patient (and always sanitize between touching your hands and the eyes of the patient!).
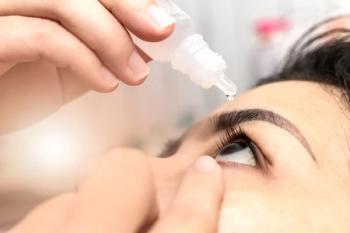
Instilling eye drops
You may use tropicamide and phenylephrine to dilate, but we use “giggle drops,” “Batman drops,” and “Princess drops.” Try relating the experience of getting drops to something that does not scare them. For example, “Do you like swimming? Getting eye drops is a lot like getting pool water in your eye. It feels funny, or maybe burns, but it goes away really fast.”
Try putting a drop on the child’s hand to demonstrate the drops will not hurt. If children still refuse, make sure you obtain the consent and assistance of the parents if more force or restraint is required. Let children sit in their parent’s lap, or hold the parent’s hand. You need to work quickly if you are instilling more than one drop. Get multiple drops ready on the counter and take all the lids off before you start administering.
Summary
Start with broad details and, as the pediatric patient gets older, you can drill down further and obtain the perfect adult type of eye exam. Use the less sophisticated methods, and gradually increase the complexity of methods as the child gets older. You have to accept that you will not get a perfect exam on a child, but that does not mean you should not try to get something on every pediatric patient.
If you have never used some of these techniques, give them a try with your next pediatric exam. The more you perform these techniques, the more confident you will become interpreting and documenting the results. Keep in mind that even a well-equipped pediatric ophthalmology practice must employ less sophisticated methods of evaluation to begin yielding exam results on young children.
Make it fun, use games, and start documenting your findings and observations on your pediatric patients. By doing this, you will get more of an exam and have a more productive and fulfilling experience with your pediatric patients.
Newsletter
Want more insights like this? Subscribe to Optometry Times and get clinical pearls and practice tips delivered straight to your inbox.
Advertisement
Related Content
Advertisement


Latest CME


Advertisement
Advertisement
Trending on Optometry Times - Clinical News & Expert Optometrist Insights
1
Takeaways from this week in optometry: December 1 - December 5
2
Crafting your own eyewear brand: Success starts with personalization
3
Phase 1 trial findings confirm safety and tolerability of Huons’ dry eye therapy
4
The mechanics of presbyopia: From muscle movement to functional vision
5

